

Cropping photos to our specific dimensions of 1200 pixels x 800 pixels isn’t difficult. There are a variety of options, including websites that are free to use.
Croppola (Free Online Tool)
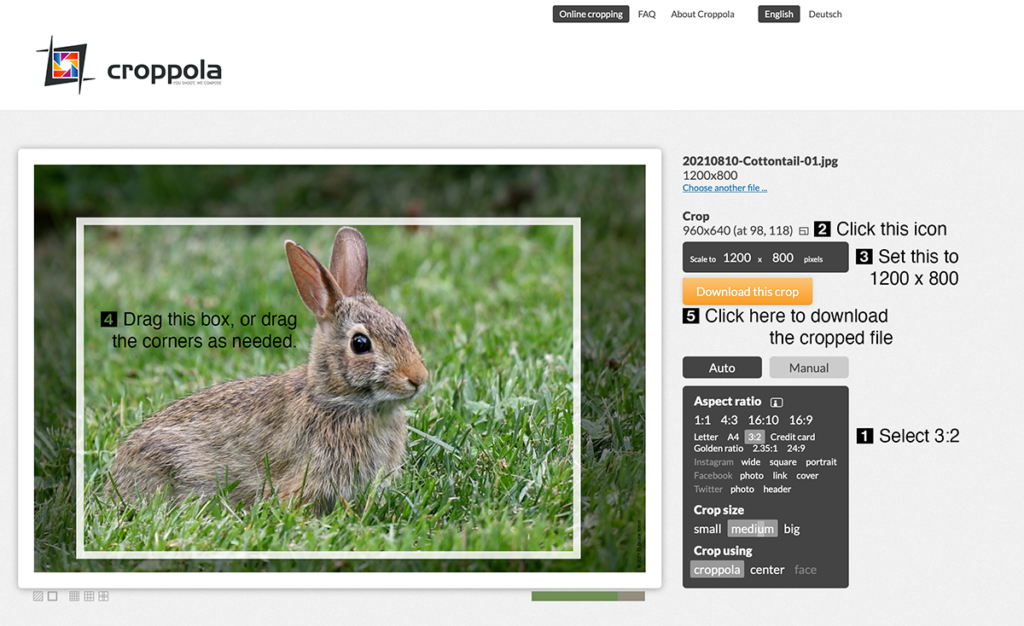
If you don’t own a photo editor, you can use an online service like Croppola.com
Drop the photo you want to crop onto the webpage. Then:
- Select 3:2 for Aspect Ratio.
- Click on the two nested boxes just above the Download this crop icon.
- Then update the values to 1200 x 800 pixels.
- You can then drag the crop box around and by selecting the corners make the window larger or smaller.
- Click on Download this crop button.
Croppola, Step 2 Optimizilla
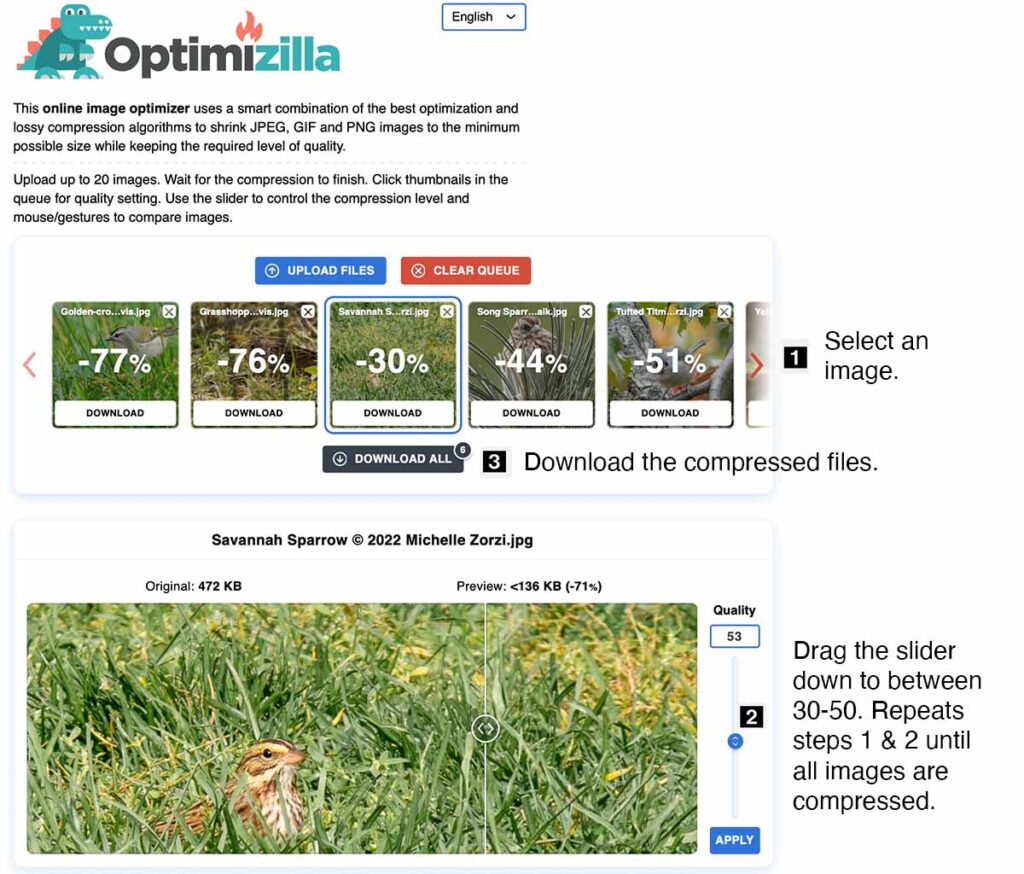
Croppola generates fairly large sized files and uses very little JPEG compression. To ensure that our Field Trip Reports load quickly on the website, images should be about 250K or smaller. After you crop all of you images, go to Optimizilla (imagecompressor.com). Drag all of the files you just cropped onto the website. Then:
- Select the first image
- Drag the slider down to between 30-50. Repeat steps 1 & 2 until all images are compressed.
- Download the compressed files. They will appear as a zip file in your downloads folder named, imagecompressor.zip. Unzip the file and confirm all of the images are less than 250K.
Apple Photos
In Apple’s Photo program, you have to first crop your photograph using a 3:2 ratio and then export the photograph using a 1200 pixel width.
You start by selecting the photograph you want to export, in any album, by double clicking on it. Then choose Edit in the upper left hand corner. At the top of the window, in the center you’ll see three option, Adjust, Filters and Crop. Select Crop. Under Aspect, choose 3:2. Drag the crop bars as needed.
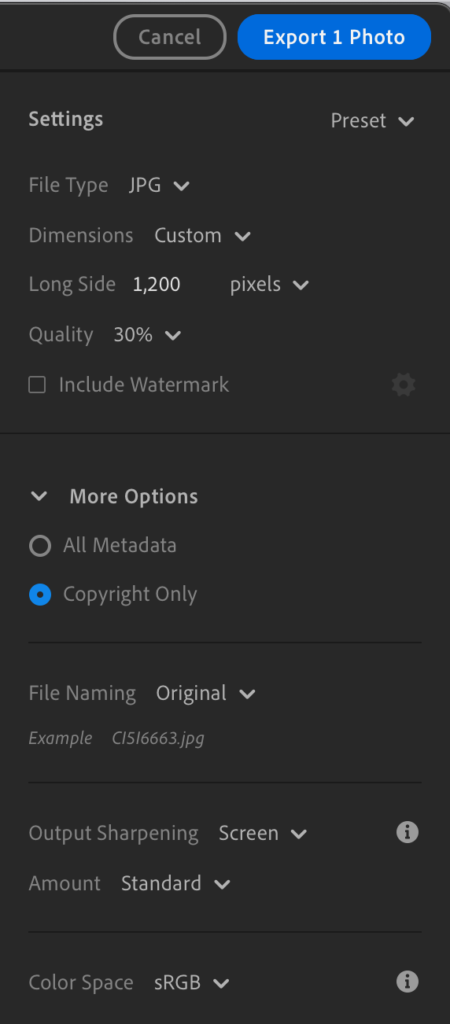
Once you’ve cropped the photograph, you then export using the menu option, File, Export, Export 1 Photo… Set the options as follows:
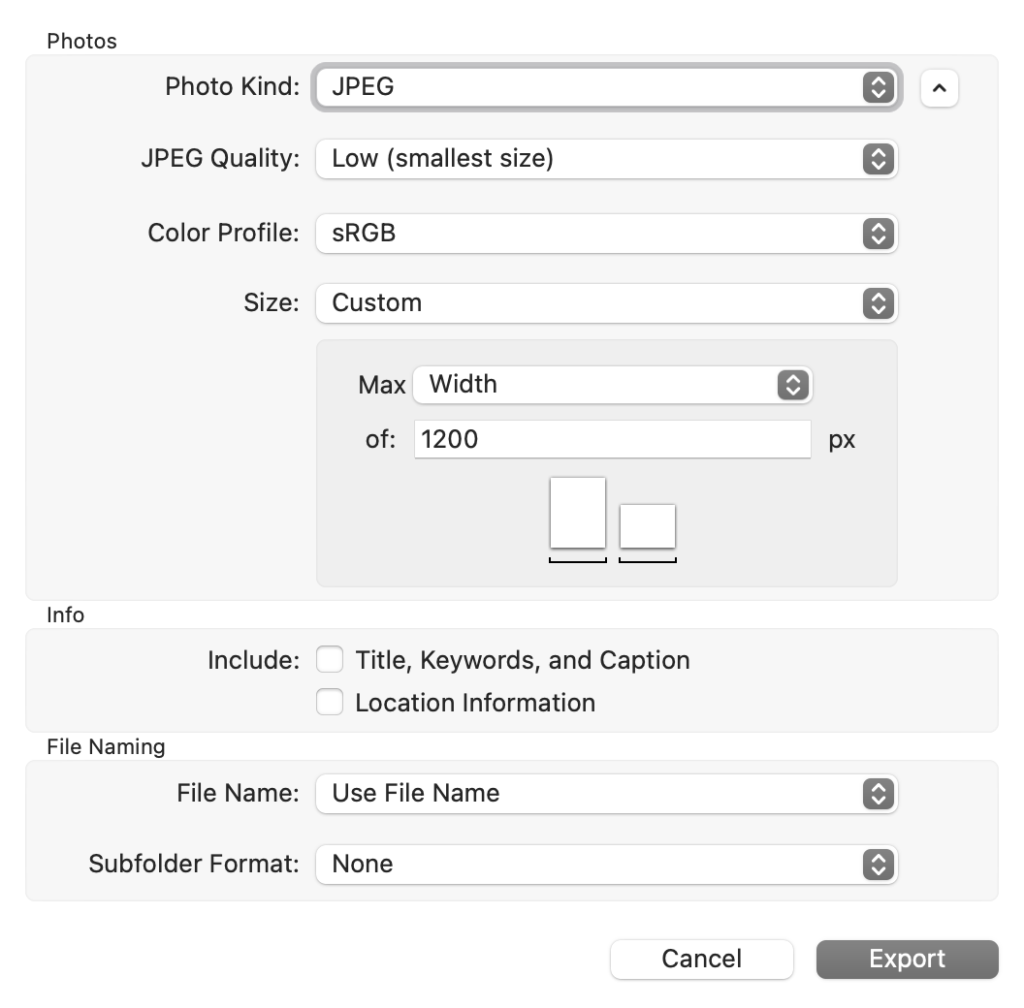
Then select where you want to save the files. Repeat as needed to process your photos. Once you’ve cropped and saved all your photos, go to the folder where you saved the files, and rename them.
You just need to be careful not to over crop your photographs. It’s possible to end up with files smaller than 1200 pixels wide. To double check if you have over cropped, select the exported file and choose File, Get Info. If the Dimensions are smaller than 1200×800, you over cropped the original image.
Adobe Photoshop
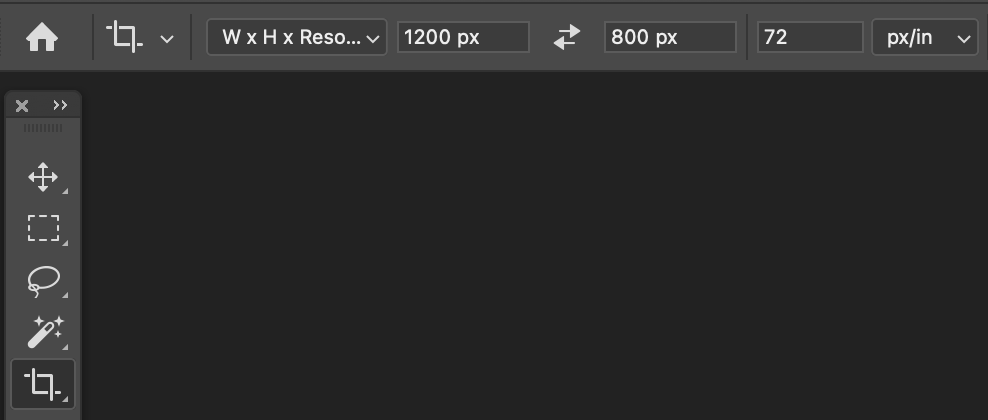
If you use Adobe Photoshop, just use the Crop Tool, select W x H x Resolution in the drop down menu, and type in 1200 px, 800 px and whatever resolution you like, although 72 or 96 px/in are the most common. Then crop your photos.
Adobe Lightroom
In Adobe Lightroom, you have to first crop your photograph using a 3:2 ratio and then export the photograph using a 1200 pixel width.
You start by selecting the photograph you want to export. Then choose Crop and Rotate icon in the upper left hand corner. It’s a crop icon with two arrows. Under Aspect Ratio, choose 3×2. Drag the crop window as needed, and double click on the image when you’re done.
Once you’ve cropped the photograph, you then export it using the menu option, File, Export… Set the options as follows:
Then select where you want to save the files. Repeat as needed to process your photographs. Once you’ve cropped and saved all your photos, go to the folder where you saved the files, and rename them.
Adobe Lightroom Classic
In Adobe Lightroom Classic, you have to first crop your photograph using a 3:2 ratio and then export the photograph using a 1200 pixel width.
You start by selecting the photograph you want to export. Then select Develop, and select the Crop & Straighten tool in the upper left hand corner. It’s an icon with a dashed box. Under Aspect:, choose 2 x 3 / 4 x 6. (When you use the tool, the crop window might default to being in portrait rather than landscape mode. If this happens, you drag a corner quickly, and the crop window will flip from portrait to landscape.) Drag the crop window as needed, and double click on the image when you’re done.
Once you’ve cropped the photograph, you then export it using the menu option, File, Export… Set the options as follows:

- Set the Export Location and File Naming to whatever is convenient.
- Under File Settings, set
- Image Format to JPEG
- Quality to 30
- Color Space to sRGB
- Under Image Sizing, set
- Resize to Fit to Dimensions, 1,200 x 800 pixels
- Resolution to 72 or 96 pixels per inch
- Under Output Sharpening, set
- Sharpen For to Screen
- Amount to Standard
- Under Metadata, set
- Include to Copyright Only
Once you have made all these settings, you can save these setting as a preset by choosing Add in the left hand panel. You only need to do this once. Then click on Export to export your photograph.
Repeat as needed to process your photographs. Once you’ve cropped and saved all your photos, go to the folder where you saved the files, and rename them.
Other Applications
If you use another editing tool other than the ones listed above, Google will usually put you on the right path, if you search on “how do i crop to a specific size in” and then add your application’s name.
If you are using a smartphone or tablet, there are a number of free cropping tools in the Apple and Google Apps stores.